手写数字识别
先给代码,如下:
import torch
from torch import nn
from torch.nn import functional as F
from torch import optim
import torchvision
from matplotlib import pyplot as plt
from utils import plot_image, plot_curve, one_hot
# step.1 Load Dataset
batch_size = 512
train_loader = torch.utils.data.DataLoader(
torchvision.datasets.MNIST('mnist_data', train=True, download=True,
transform=torchvision.transforms.Compose([
torchvision.transforms.ToTensor(), # 将灰度图片像素值(0~255)转为Tensor(0~1),方便后续处理
torchvision.transforms.Normalize(
(0.1307,), (0.3081,)) # 归一化,均值0,方差1
])),
batch_size=batch_size, shuffle=True)
test_loader = torch.utils.data.DataLoader(
torchvision.datasets.MNIST('mnist_data/', train=False, download=True,
transform=torchvision.transforms.Compose([
torchvision.transforms.ToTensor(), # 将灰度图片像素值(0~255)转为Tensor(0~1),方便后续处理
torchvision.transforms.Normalize(
(0.1307,), (0.3081,)) # 归一化,均值0,方差1
])),
batch_size=batch_size, shuffle=False)
# x, y = next(iter(train_loader))
# print(x.shape, y.shape, x.min(), x.max())
# plot_image(x, y, 'image')
# step.2 Build Module
class Net(nn.Module):
def __init__(self):
super(Net, self).__init__() # python的父类初始化
# wx + b
self.fc1 = nn.Linear(28 * 28, 256)
self.fc2 = nn.Linear(256, 64)
self.fc3 = nn.Linear(64, 10)
def forward(self, x):
# x: [b, 1, 28, 28]
# h1 = relu(w1x + b1)
x = F.relu(self.fc1(x))
# h2 = relu(h1w2 + b2)
x = F.relu(self.fc2(x))
# h3 = h2w3 + b3
x = self.fc3(x)
return x
# step.3 train module
net = Net()
# [w1, b1, w2, b2, w3, b3]
optimizer = optim.SGD(net.parameters(), lr=0.01, momentum=0.9)
train_loss = []
for epoch in range(3):
for batch_idx, (x, y) in enumerate(train_loader):
# x: [b, 1, 28, 28], y: [512]
# [b, 1, 28, 28] => [b, 784]
x = x.view(x.size(0), 28 * 28)
# => [b,10]
out = net(x)
# [b,10]
y_onehot = one_hot(y)
# loss = mse(out, y_onehot)
loss = F.mse_loss(out, y_onehot)
# 梯度计算
optimizer.zero_grad() # 清零梯度
loss.backward() # 反向传播
# w' = w - lr*grad
optimizer.step()
train_loss.append(loss.item())
if batch_idx % 10 == 0:
print(epoch, batch_idx, loss.item())
torch.save(net, 'Number_recognition.pt')
# get optimal [w1, b1, w2, b2, w3, b3]
# step.4 Test
total_correct = 0
for x, y in test_loader:
x = x.view(x.size(0), 28*28)
out = net(x)
# out: [b, 10] => pred: [b]
pred = out.argmax(dim=1)
correct = pred.eq(y).sum().float()
total_correct += correct
total_num = len(test_loader.dataset)
acc = total_correct / total_num
print("test acc:", acc)
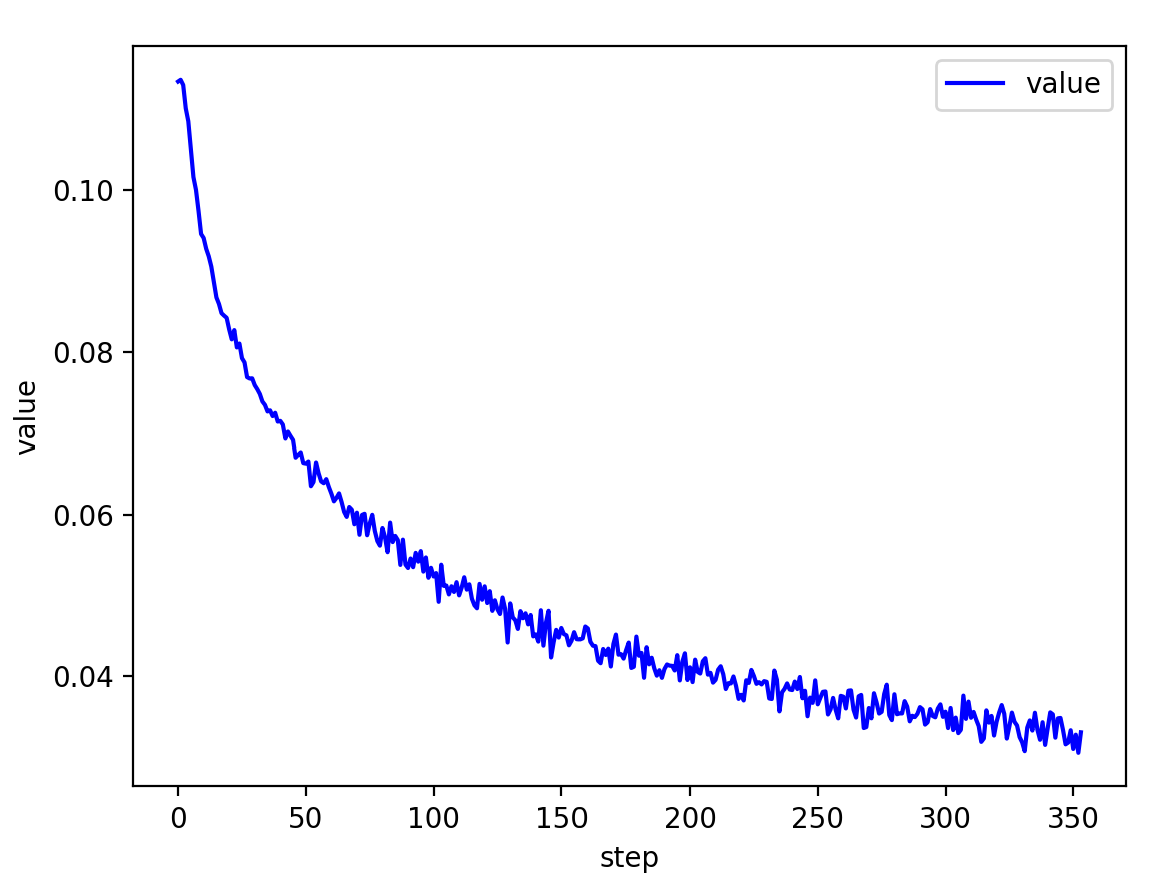
plot_curve(train_loss)
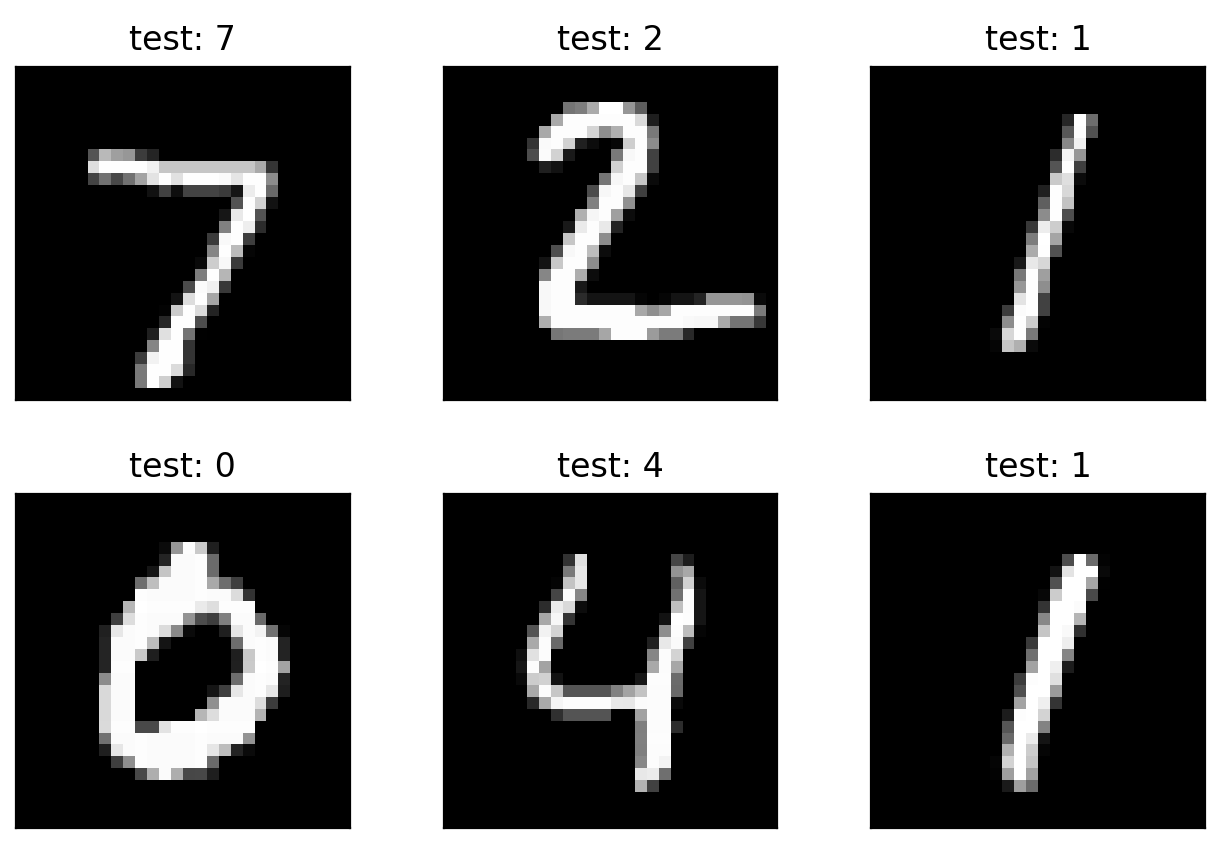
x, y = next(iter(test_loader))
out = net(x.view(x.size(0), 28*28))
pred = out.argmax(dim=1)
plot_image(x, pred, 'test')
结果:
接下来代码讲解
step.1 Load Dataset
我们使用的是非常经典的 mnist_data 手写数字数据集
这里配好环境之后,如何没有mnist_data数据集,会从网上自行下载,不用担心
torch.utils.data.DataLoader是一个数据加载器,该做的都给我们做完了
step.2 Build Module
这里我们继承nn.Module这个模型类来实现自己的模型
forward函数会在 "call" 里面被调用,这些都是python类的知识,如下:
forward方法是必须要重写的,它是实现模型的功能,实现各个层之间的连接关系的核心
只要在nn.Module的子类中定义了forward函数,backward函数就会被自动实现(利用Autograd)
自动调用 forward 函数原因分析:
利用Python的语言特性,y = model(x)是调用了对象model的*call**方法,而nn.Module把*_*call*_方法实现为类对象的forward函数,所以任意继承了nn.Module的类对象都可以这样简写来调用forward函数
关于模型的搭建都是通式,模板是固定的,只要写过一次,就可以改别人的网络了
# step.2 Build Module
class Net(nn.Module):

    def __init__(self):
        super(Net, self).__init__()  # python的父类初始化
        # wx + b
        self.fc1 = nn.Linear(28 * 28, 256)
        self.fc2 = nn.Linear(256, 64)
        self.fc3 = nn.Linear(64, 10)

    def forward(self, x):
        # x: [b, 1, 28, 28]
        # h1 = relu(w1x + b1)
        x = F.relu(self.fc1(x))
        # h2 = relu(h1w2 + b2)
        x = F.relu(self.fc2(x))
        # h3 = h2w3 + b3
        x = self.fc3(x)

        return x
step.3 train module
net = Net()
# [w1, b1, w2, b2, w3, b3]
optimizer = optim.SGD(net.parameters(), lr=0.01, momentum=0.9)

train_loss = []
for epoch in range(3):

    for batch_idx, (x, y) in enumerate(train_loader):
        # x: [b, 1, 28, 28], y: [512]
        # [b, 1, 28, 28] => [b, 784]
        x = x.view(x.size(0), 28 * 28)
        # => [b,10]
        out = net(x)
        # [b,10]
        y_onehot = one_hot(y)
        # loss = mse(out, y_onehot)
        loss = F.mse_loss(out, y_onehot)

        # 梯度计算
        optimizer.zero_grad()   # 清零梯度
        loss.backward()         # 反向传播
        # w' = w - lr*grad
        optimizer.step()

        train_loss.append(loss.item())
        if batch_idx % 10 == 0:
            print(epoch, batch_idx, loss.item())

torch.save(net, 'Number_recognition.pt')
这里的每一步都是框架预先实现了的,我们直接调函数就行了
我们的这个卷积神经网络非常简单,就3个线性层
有不懂的函数就直接上网查就可以查到了
step.4 Test
# step.4 Test
total_correct = 0
for x, y in test_loader:
    x = x.view(x.size(0), 28*28)
    out = net(x)
    # out: [b, 10] => pred: [b]
    pred = out.argmax(dim=1)
    correct = pred.eq(y).sum().float()
    total_correct += correct

total_num = len(test_loader.dataset)
acc = total_correct / total_num
print("test acc:", acc)
plot_curve(train_loss)

x, y = next(iter(test_loader))
out = net(x.view(x.size(0), 28*28))
pred = out.argmax(dim=1)
plot_image(x, pred, 'test')
这里就是对我们训练出来的模型进行测试了,从 test_loader 测试集下载器里面把测试数据拿出来
向前传播预测出结果,与测试集进行比对,最后展示预测结果